How To Invoice as a Freelancer Like a Pro (With Templates)

When you finish a freelance project, your work isn’t done. Now comes the part many freelancers dread: asking for payment.
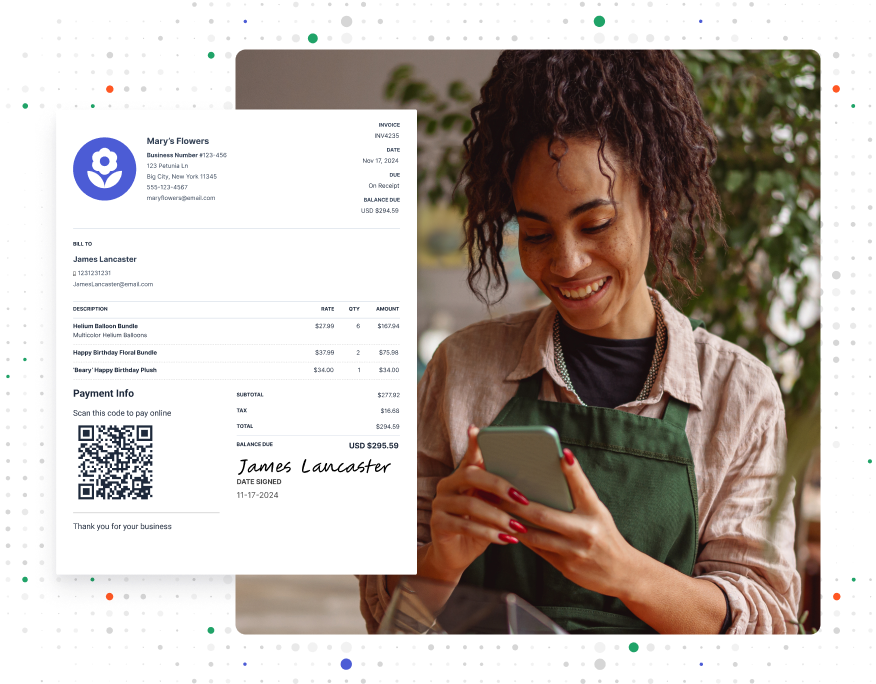
An invoice is your official bill for freelance work. It lists what you did, how much it costs, and when you need to get paid. A good invoice helps you look professional and gets you your money faster.
This guide explains everything you need to know about how to invoice as a freelancer. Discover all the parts you need to include, how to simplify the invoicing process with templates, and the best time to send them out.
RELATED ARTICLE — How To Create an Invoice in Excel (With Free Templates)
What Is Freelance Invoicing?
An invoice is a bill you send after finishing work for a client. It works as your record keeper, legal backup, and professional calling card all rolled into one simple document. But unlike big companies with fancy billing departments, most freelancers handle all this themselves.
The best freelance or self-employed invoices do several important jobs at once. They spell out exactly what work you did and how much you’re charging. They also give clients all the details they need to pay you, from payment terms to due dates. And they create a paper trail that keeps tax season stress-free and protects you if any payment questions come up down the line.
A typical invoice fits on one page, with your work broken down into a clear, itemized list. It includes a few fundamental parts, including:
- Contact information and business details
- The client’s contact information
- What you’re charging for
- How you want to get paid
- Which payment options you accept
Considering how important they are to get right, it’s understandable that some freelancers break into a sweat when faced with this business task.
Thankfully, the days of writing out each invoice by hand are long gone. Using freelance invoicing templates makes the invoicing process much faster, easier, and more accurate.
RELATED ARTICLE — A Guide to Common Types of Invoices and Price Quotes
How To Create an Invoice for Freelance Work Using Templates

Ready to make your first invoice (or your first new and improved one)? It starts with choosing the perfect template.
First, look at a compilation of great freelance invoice templates. Feel free to download, modify, and use any you like. For more templates, refer to Invoice Simple’s main freelance invoice templates page.
With a template in hand, here’s how to send an invoice as a freelancer step by step:
1. Make Your Header Stand Out
Put your business name front and center at the top of your invoice template. Add your professional logo too. It makes your invoice look polished and helps clients remember you. Your template should have a space for these in the upper left or right corner, just like other business documents.
2. Add Your Information
List your full business name and the address you work from. Include several ways for clients to reach you, like your email, phone number, and website if you have one.
If you hold any professional licenses or certifications relevant to your work, add those too. The easier you make it for clients to contact you, the faster you’ll get paid.
3. Get Client Details Right
Write out your client’s complete business name and billing address. Include the name of the person who handles invoices. This might be different from your usual contact, so double-check.
For bigger companies, add their department or division. Go over these details carefully because incorrect information can delay your payment.
4. Number Everything Properly
Every invoice needs its own unique invoice number. You can use whatever invoice numbering system that works best for you. This could be a simple sequential system starting from 1 and going up from there. Or you could add features that make tracking easier, like different starting digits for each client to make it easier to track who’s who at tax time. What matters is that your system makes sense to you.
Don’t forget to write the date you’re sending the invoice and when payment is due. If your client gave you a purchase order or project number, include that too.
5. Break Down Your Work
List everything you did in clear, simple terms. Say exactly how many hours you worked or what items you delivered. Write in your rate for each item, like $50 per hour or $500 per logo design.
Be specific. Vague descriptions like “design work” aren’t as helpful as concrete ones like “landing page redesign.” Then, tally up each line so clients can see how you got to the total.
6. Include Extra Costs
List any expenses you covered for your client separately from your main work. This might include things like domain names, stock photos, or travel costs.
You may want to keep these extras in their own section so clients can easily see the difference between your work and other costs. Review everything to make sure it matches what you agreed to in your contract.
7. Add It All Up
Show your subtotal before any taxes or fees. Then, list any taxes you need to charge. If you offer discounts, add those too. Write in the grand total in the spot designated for it on your freelancer invoice template. On a good template, it’ll be clearly marked out from the rest of the invoice.
Double-check your math before sending an invoice. Even minor mistakes make you look unprofessional and can lead to payment delays.
8. Explain How to Pay
List all the payment options you accept, like bank transfers or credit cards. Give all the details your clients need to settle the bill. If you accept online payments, include direct links.
Write out your payment terms clearly, including when payment is due and any late fees or discounts outlined in your contract.
9. Polish and Finalize
Paying attention to the details leaves your clients with a positive impression. Here are some finishing touches to go the extra mile:
- Add a friendly but professional “Thank you for your business” note.
- Save your invoice in a format that preserves the formatting, like a PDF.
- Use a clear email subject line with your invoice number and business name to help clients track your bill.
- Always keep copies of all invoices for your taxes.
RELATED ARTICLE — Creating an Effective Invoice Number System: Best Practices
When To Send an Invoice as a Freelancer

Timing your invoices effectively can help you get paid on time. For one-time projects, send your invoice as soon as you finish the work. Many clients expect this, and it keeps the project fresh in their minds so they’re less likely to delay or forget payment.
For bigger projects, break up the billing. You might send invoices after finishing key parts of the work or bill for half upfront and half when you’re done. Just make sure your client is on board with the plan before you start.
If you work with the same clients regularly, set up a consistent billing schedule. This might mean sending invoices every week, every two weeks, or once a month. Pick a schedule that works for both your and your client’s needs. Remember to plan around holidays or times when your client’s office might be closed.
Whatever timing you choose, always keep your clients in the loop. Let them know when to expect your invoices. Send gentle reminders when a payment due date is approaching.
RELATED ARTICLE — What Is Customer Relations? Everything You Need To Know for Your Business
3 Best Invoicing Tips For Freelancers
The right tools and habits make your invoicing process smooth and painless. Here’s how to write an invoice for freelance work that gets the job done:
- Get Organized. Create folders for each client’s invoices. When you make an invoice, put it in the right folder and back it up in at least two places. Name your files clearly. Something like “ClientName_InvoiceNumber_Date” makes them easy to find later.
- Offer Payment Choices. The easier you make it to pay, the faster you get your money. Popular payment options include bank transfers, credit cards, and payment apps. With today’s technology, they’re easy to set up, especially with tools like Invoice Simple that do the work for you.
- Use Invoicing Software. Invoicing software can save you hours of work without having to spend a fortune. You can use invoicing software to create invoices quickly, track expenses, and even accept common payment options.
FROM ONE OF OUR PARTNERS — The 7 Best Invoice Software Options for Small Businesses
Create Estimates and Invoices Instantly With Invoice Simple
Templates make invoicing easier. Invoice Simple’s software makes it a breeze.
Get your invoicing done in minutes, not hours. Create estimates and invoices on the road or at home. Quickly add details such as discounts, payment instructions, due dates, photos, signatures, shipping details, and more. Turn estimates into invoices with one click.
Start Your First
Invoice Today
Create customized and professional
invoices and connect with clients


